Your cart is currently empty!
Category: Business Automation & Intelligent Bots
Streamline workflows, cut operational overhead, and delight customers with business automation and intelligent bots. Our articles cover everything from RPA (Robotic Process Automation) and chatbot frameworks to workflow orchestration tools that eliminate repetitive tasks and free your team to focus on strategic work. Discover how to implement conversational AI for 24/7 support, automate invoice processing, and integrate intelligent bots in your CRM for seamless lead management. Packed with practical tool comparisons, implementation strategies, and success stories, this category equips you to design and deploy automation solutions that scale with your business. Start automating smarter—explore our Business Automation & Intelligent Bots insights today!
-
What is Moltbot? Complete Guide to Clawdbot AI Setup
In 2025, artificial intelligence has transformed the way we interact with technology. From customer service chatbots to personal productivity assistants, AI-powered automation has become essential for individuals and businesses alike. If you have been searching for a powerful Telegram bot that combines the intelligence of modern AI with seamless automation, you have likely encountered Clawdbot—also known as Moltbot. This comprehensive guide will answer the question what is Moltbot, explore its features, and walk you through everything you need to know about Moltbot AI and how to get started.
What is Moltbot? Understanding the Clawdbot Moltbot Connection
Before diving into the technical details, let’s address one of the most common questions in the community: what is Moltbot, and how does it relate to Clawdbot?
Simply put, Clawdbot Moltbot refers to the same powerful automation tool. The project started under the name Molt (short for “Moltbot”) and later gained the alternative name Clawdbot within certain communities. Whether you search for Moltbot vs Clawdbot or Clawbot Moltbot, you are looking at the same software with identical capabilities.
Moltbot AI is a sophisticated Telegram automation bot that leverages multiple artificial intelligence providers, including Claude (from Anthropic) and OpenAI‘s GPT models. This multi-provider approach gives users flexibility in choosing the AI engine that best suits their needs, whether for conversational chat, content generation, or complex task automation.
The confusion between Clawdbot and Moltbot often arises from community discussions on platforms like Moltbot Reddit threads, where users use the names interchangeably. Some even abbreviate it further to Clawd or simply Clawbot. Regardless of the name you use, the underlying technology remains consistent and powerful.
Key Features of Clawdbot AI: Why Users Choose This Telegram Bot
The popularity of Clawdbot AI stems from its versatile feature set. Unlike single-purpose bots, Moltbot AI combines multiple functionalities into one cohesive platform. Here is what makes it stand out:
1. Multi-AI Provider Support
One of the most significant advantages of Clawdbot AI is its support for multiple AI backends. Users can switch between Claude and OpenAI models depending on their specific requirements:
- Claude: Anthropic’s AI model is known for nuanced, thoughtful responses and strong ethical guidelines. It excels at complex reasoning and detailed explanations.
- OpenAI: The GPT family of models offers broad general knowledge and creative capabilities, making it ideal for content generation and brainstorming.
This flexibility means you are not locked into a single AI ecosystem. As new models emerge, Moltbot AI can integrate them, future-proofing your automation setup.
2. Telegram-Native Integration
Unlike web-based AI tools that require you to open a browser, Clawdbot operates directly within Telegram. This provides several benefits:
- Instant Access: Send a message to your bot and receive AI-powered responses immediately.
- Mobile-Friendly: Use the bot from your phone, tablet, or desktop without switching applications.
- Group Integration: Add the bot to Telegram groups for team collaboration and shared AI assistance.
3. Task Automation and Content Generation
Clawdbot AI goes beyond simple chat. Users leverage it for:
- Automated Responses: Set up triggers and workflows to automate repetitive messaging tasks.
- Content Creation: Generate articles, social media posts, code snippets, and more directly from Telegram.
- Data Processing: Summarize documents, translate text, and analyze information on the fly.
Moltbot Setup: A Complete Installation Guide
Ready to get started? The Moltbot setup process is straightforward, especially if you follow this step-by-step guide. Before you install Moltbot, ensure you have the necessary prerequisites in place.
Prerequisites for Installation
To successfully install Moltbot, you will need:
- A Telegram Account: Create a bot through Telegram’s BotFather to obtain your API token.
- AI API Keys: Register for API access with Claude (Anthropic) and/or OpenAI.
- Docker: The recommended installation method uses Docker for containerized deployment.
- A Server or Local Machine: You can run Moltbot on cloud servers, a home server, or even a Mac Mini.
Moltbot Docker Installation (Recommended)
The Moltbot Docker method is the most popular approach because it simplifies dependency management and ensures consistent behavior across different operating systems. Here is how to deploy using Docker:
Step 1: Install Docker
If you haven’t already, download and install Docker Desktop for your operating system. Verify the installation:
docker --version
docker-compose --version
Step 2: Create Project Directory
Create a dedicated directory for your Moltbot installation:
mkdir moltbot && cd moltbotStep 3: Create docker-compose.yml
Create a
docker-compose.ymlfile with the following configuration:version: '3.8' services: moltbot: image: moltbot/moltbot:latest container_name: moltbot restart: unless-stopped environment: - TELEGRAM_BOT_TOKEN=your_telegram_bot_token - ANTHROPIC_API_KEY=your_claude_api_key - OPENAI_API_KEY=your_openai_api_key - DEFAULT_AI_PROVIDER=claude - LOG_LEVEL=info volumes: - ./data:/app/data - ./config:/app/config ports: - "3000:3000"Step 4: Create Environment File
For better security, create a
.envfile to store your API keys:# .env file TELEGRAM_BOT_TOKEN=123456789:ABCdefGHIjklMNOpqrsTUVwxyz ANTHROPIC_API_KEY=sk-ant-api03-xxxxxxxxxxxxx OPENAI_API_KEY=sk-xxxxxxxxxxxxxxxxxxxxx DEFAULT_AI_PROVIDER=claude LOG_LEVEL=infoStep 5: Launch the Container
Start Moltbot Docker with a single command:
docker-compose up -dStep 6: Verify the Installation
Check that the container is running:
docker ps
docker logs moltbot
Send a test message to your bot on Telegram to confirm everything is working.
The beauty of the Docker approach is portability. Whether you are running Moltbot Windows, macOS, or Linux, the containerized environment behaves identically.
Moltbot npm Alternative
For developers who prefer Node.js environments, Moltbot npm provides an alternative installation path. This method is particularly useful if you want to customize the bot’s behavior or integrate it into an existing Node.js application.
Step 1: Verify Node.js Installation
Ensure Node.js (version 18 or higher) is installed:
node --version  # Should be v18.0.0 or higher
npm --version
Step 2: Create Project Directory
mkdir moltbot-app && cd moltbot-app
npm init -y
Step 3: Install Moltbot Package
Install Moltbot npm and its dependencies:
npm install moltbot
npm install dotenv
Step 4: Create Configuration File
Create a
.envfile in your project root:# .env TELEGRAM_BOT_TOKEN=your_telegram_bot_token ANTHROPIC_API_KEY=your_claude_api_key OPENAI_API_KEY=your_openai_api_key DEFAULT_PROVIDER=claudeStep 5: Create Entry Point
Create an
index.jsfile:require('dotenv').config(); const { MoltBot } = require('moltbot'); const bot = new MoltBot({ telegramToken: process.env.TELEGRAM_BOT_TOKEN, anthropicKey: process.env.ANTHROPIC_API_KEY, openaiKey: process.env.OPENAI_API_KEY, defaultProvider: process.env.DEFAULT_PROVIDER || 'claude', }); bot.start(); console.log('Moltbot is running...');Step 6: Run the Application
node index.jsOptional: Add to package.json Scripts
{
  "scripts": {
    "start": "node index.js",
    "dev": "nodemon index.js"
  }
}
Moltbot Windows Setup
Running Moltbot Windows is straightforward with Docker Desktop for Windows. Here’s a complete setup guide:
Step 1: Enable WSL2
Open PowerShell as Administrator and run:
wsl --install
wsl --set-default-version 2
Restart your computer after installation.
Step 2: Install Docker Desktop
Download Docker Desktop for Windows and ensure WSL2 backend is enabled in Settings > General.
Step 3: Create Project Folder
Open PowerShell and create your project directory:
mkdir C:\moltbot
cd C:\moltbot
Step 4: Create Configuration Files
Create
docker-compose.ymlusing PowerShell:New-Item -ItemType File -Name "docker-compose.yml" notepad docker-compose.ymlStep 5: Configure Windows Firewall
Allow Docker through Windows Firewall:
New-NetFirewallRule -DisplayName "Docker" -Direction Inbound -Action Allow -Protocol TCP -LocalPort 3000Step 6: Launch Moltbot
docker-compose up -d
docker logs -f moltbot
Optional: Auto-Start on Boot
Create a scheduled task to start Moltbot Windows automatically:
schtasks /create /tn "MoltbotStartup" /tr "docker-compose -f C:\moltbot\docker-compose.yml up -d" /sc onstart /ru SYSTEMMoltbot Mac Mini: The Perfect Home Server
The Mac Mini has become a popular choice for running always-on services like Moltbot. Its compact size, low power consumption, and reliable macOS environment make it ideal for home automation enthusiasts.
Step 1: Install Homebrew and Docker
Open Terminal and install the prerequisites:
# Install Homebrew
/bin/bash -c "$(curl -fsSL https://raw.githubusercontent.com/Homebrew/install/HEAD/install.sh)"

# Install Docker Desktop
brew install --cask docker
Step 2: Disable Sleep Mode
Prevent your Mac Mini from sleeping to keep Moltbot running 24/7:
# Disable sleep entirely
sudo pmset -a disablesleep 1

# Or use caffeinate for the Docker process
caffeinate -i docker-compose up -d
Step 3: Create Project Directory
mkdir ~/moltbot && cd ~/moltbotStep 4: Create docker-compose.yml
cat << 'EOF' > docker-compose.yml
version: '3.8'
services:
  moltbot:
    image: moltbot/moltbot:latest
    container_name: moltbot
    restart: always
    env_file:
      - .env
    volumes:
      - ./data:/app/data
EOF
Step 5: Configure Environment Variables
cat << 'EOF' > .env
TELEGRAM_BOT_TOKEN=your_token_here
ANTHROPIC_API_KEY=your_claude_key
OPENAI_API_KEY=your_openai_key
DEFAULT_AI_PROVIDER=claude
EOF
Step 6: Launch and Enable Auto-Start
# Start Moltbot
docker-compose up -d

# Create LaunchAgent for auto-start on boot
cat << EOF > ~/Library/LaunchAgents/com.moltbot.startup.plist
<?xml version="1.0" encoding="UTF-8"?>
<!DOCTYPE plist PUBLIC "-//Apple//DTD PLIST 1.0//EN" "http://www.apple.com/DTDs/PropertyList-1.0.dtd">
<plist version="1.0">
<dict>
    <key>Label</key>
    <string>com.moltbot.startup</string>
    <key>ProgramArguments</key>
    <array>
        <string>/usr/local/bin/docker-compose</string>
        <string>-f</string>
        <string>$HOME/moltbot/docker-compose.yml</string>
        <string>up</string>
        <string>-d</string>
    </array>
    <key>RunAtLoad</key>
    <true/>
</dict>
</plist>
EOF

launchctl load ~/Library/LaunchAgents/com.moltbot.startup.plist
The Moltbot Mac Mini combination is particularly popular in the Moltbot Reddit community, where users share optimization tips and configuration examples.
Getting Started with GitHub: Clawdbot and Moltbot Repositories
The official source code and documentation for the project are hosted on GitHub. Whether you search for GitHub Moltbot or GitHub Clawdbot, you will find comprehensive resources to help you get started.
Finding the GitHub Repository
The GitHub Moltbot repository contains:
- Source Code: The complete codebase for developers who want to customize or contribute.
- Documentation: Detailed guides covering installation, configuration, and advanced usage.
- Issues and Discussions: A community forum for reporting bugs and requesting features.
- Release Notes: Changelog documenting new features and fixes in each version.
When browsing GitHub Clawdbot resources, pay attention to the README file, which provides quick-start instructions and links to more detailed documentation.
Cloning and Configuration
To set up from GitHub, follow these developer steps:
Step 1: Clone the Repository
git clone https://github.com/moltbot/moltbot.git
cd moltbot
Step 2: Install Dependencies
npm installStep 3: Configure Environment
# Copy the example configuration
cp .env.example .env

# Edit with your preferred editor
nano .env  # or code .env for VS Code
Step 4: Configure Your API Keys
Update the
.envfile with your credentials:# Telegram Configuration TELEGRAM_BOT_TOKEN=123456789:ABCdefGHIjklMNOpqrsTUVwxyz # AI Provider Keys ANTHROPIC_API_KEY=sk-ant-api03-xxxxxxxxxxxxx OPENAI_API_KEY=sk-xxxxxxxxxxxxxxxxxxxxx # Default Settings DEFAULT_AI_PROVIDER=claude AI_MODEL=claude-3-opus-20240229 MAX_TOKENS=4096 TEMPERATURE=0.7Step 5: Build and Run
# Development mode with hot reload
npm run dev

# Production build
npm run build
npm start
Step 6: Run Tests (Optional)
npm run test
npm run lint
The GitHub repository is regularly updated with improvements. Watch the repository for notifications:
# Stay updated with the latest changes
git pull origin main
npm install
npm run build
Platform Compatibility: Running Moltbot Anywhere
One of the strengths of Clawdbot Moltbot is its cross-platform compatibility. Thanks to Docker containerization, the bot runs consistently across different operating systems.
Moltbot Windows Considerations
As mentioned earlier, Moltbot Windows users should:
- Use Docker Desktop with WSL2 backend for best performance.
- Configure Windows to allow the bot to run in the background.
- Consider using Windows Task Scheduler for automatic startup.
Moltbot Mac Mini Optimization
The Mac Mini offers excellent value for running Moltbot 24/7. Key optimization tips include:
- Disable automatic sleep in System Preferences.
- Use Docker’s resource limits to prevent excessive memory usage.
- Set up monitoring to alert you if the bot goes offline.
Linux Server Deployment
For production deployments, Linux servers offer the most robust environment. Here’s a complete Moltbot Docker setup for Ubuntu/Debian:
Step 1: Install Docker on Linux
# Update package index
sudo apt update

# Install Docker
sudo apt install -y docker.io docker-compose

# Add your user to docker group
sudo usermod -aG docker $USER

# Start Docker service
sudo systemctl enable docker
sudo systemctl start docker
Step 2: Create Moltbot Directory
sudo mkdir -p /opt/moltbot
sudo chown $USER:$USER /opt/moltbot
cd /opt/moltbot
Step 3: Create Systemd Service
Create a systemd service for automatic restarts and boot startup:
sudo cat << 'EOF' > /etc/systemd/system/moltbot.service
[Unit]
Description=Moltbot Telegram AI Bot
Requires=docker.service
After=docker.service

[Service]
Type=oneshot
RemainAfterExit=yes
WorkingDirectory=/opt/moltbot
ExecStart=/usr/bin/docker-compose up -d
ExecStop=/usr/bin/docker-compose down
TimeoutStartSec=0

[Install]
WantedBy=multi-user.target
EOF

# Enable and start the service
sudo systemctl daemon-reload
sudo systemctl enable moltbot
sudo systemctl start moltbot
Step 4: Monitor Logs
# View real-time logs
docker logs -f moltbot

# Check service status
sudo systemctl status moltbot
Community and Support: Moltbot Reddit and Beyond
No software thrives without a supportive community. The Moltbot Reddit community on Reddit is one of the most active spaces for discussion, troubleshooting, and sharing creative use cases.
What You’ll Find on Moltbot Reddit
Browsing Moltbot Reddit threads reveals:
- Setup Guides: User-contributed tutorials for specific platforms and configurations.
- Use Case Examples: Creative ways people use Clawdbot AI in their daily lives.
- Troubleshooting Help: Community members helping each other solve technical issues.
- Feature Requests: Discussions about desired functionality and roadmap priorities.
Other Community Resources
Beyond Reddit, you can find support through:
- GitHub Issues: For bug reports and technical problems on GitHub.
- Discord Servers: Real-time chat with other Moltbot users on Discord.
- Telegram Groups: Fitting for a Telegram bot, there are dedicated groups for user discussion.
Moltbot vs Clawdbot: Clearing Up the Confusion
By now, you understand that the Moltbot vs Clawdbot question has a simple answer: they are the same tool. However, let’s address why this confusion persists and clarify the various names you might encounter.
The Name Evolution
The project originated as Molt, a reference to the process of shedding and renewal. As the community grew, the name Moltbot became standard for referring to the bot specifically. The alternative name Clawdbot emerged as a playful nod to one of its supported AI providers, Claude.
Common Name Variations
Name Context Notes Moltbot Official name Most common in documentation Clawdbot Community name Popular in Reddit discussions Clawbot Abbreviated Casual shorthand Clawd Abbreviated Very informal reference Molt Original project name Still used in some contexts When searching online, using any of these terms—Clawdbot, Moltbot, Clawbot, Clawd, or Molt—should lead you to relevant results.
Advanced Configuration: Getting the Most from Clawdbot AI
Once you have completed the basic Moltbot setup, you can explore advanced configurations to enhance your experience.
Customizing AI Behavior
Clawdbot AI allows you to customize how the AI responds:
- System Prompts: Define the AI’s personality and response style.
- Model Selection: Choose between Claude and OpenAI models for different tasks.
- Temperature Settings: Adjust creativity levels for responses.
- Context Management: Configure how much conversation history the AI considers.
Automation Workflows
Power users leverage Moltbot AI for complex automation:
- Scheduled Tasks: Set up recurring AI-powered messages or reports.
- Trigger-Based Actions: Respond automatically to specific keywords or patterns.
- Integration with Other Services: Connect to webhooks and external APIs.
Conclusion: Start Your Clawdbot Moltbot Journey Today
We have covered substantial ground in this guide, from understanding what is Moltbot to walking through the complete Moltbot setup process. Whether you call it Clawdbot, Moltbot, Clawbot, or simply Clawd, this powerful Telegram automation tool offers unmatched flexibility with its support for both Claude and OpenAI.
The Moltbot Docker installation method makes deployment straightforward across Moltbot Windows, Moltbot Mac Mini, and Linux environments. For developers, the Moltbot npm option provides additional customization possibilities, while the GitHub Moltbot and GitHub Clawdbot repositories offer comprehensive documentation and community support.
As you begin your journey with Clawdbot Moltbot, remember that the Moltbot Reddit community and GitHub issues are excellent resources for troubleshooting and inspiration. The future of AI automation is here, and with Clawdbot AI running on your Telegram, you are well-equipped to harness its power.
Ready to install Moltbot? Head to GitHub, clone the repository, and follow the Moltbot setup guide. In just a few minutes, you will have a fully functional AI assistant at your fingertips, available anytime through Telegram.
-
How AI Reads Insurance Papers: A Guide to Intelligent Document Processing
Imagine you have a giant mountain of homework. It is taller than your house! Every page is different. Some are typed neatly, some have messy handwriting, and some have coffee stains on them. Your teacher says, “You must read all of this and type it into the computer by tomorrow, or you fail!”
Scary, right? well, this is exactly what big insurance companies in the USA deal with every single day. They get millions of papers—forms, medical reports, letters, and emails. In the past, they had to hire thousands of people to sit at desks and read these papers one by one. It was boring, slow, and expensive.
But now, they have a secret weapon. It is called Intelligent Document Processing (IDP). It is like a super-smart robot that can read faster than any human. Let’s learn how this Digital Transformation in Insurance is changing everything!
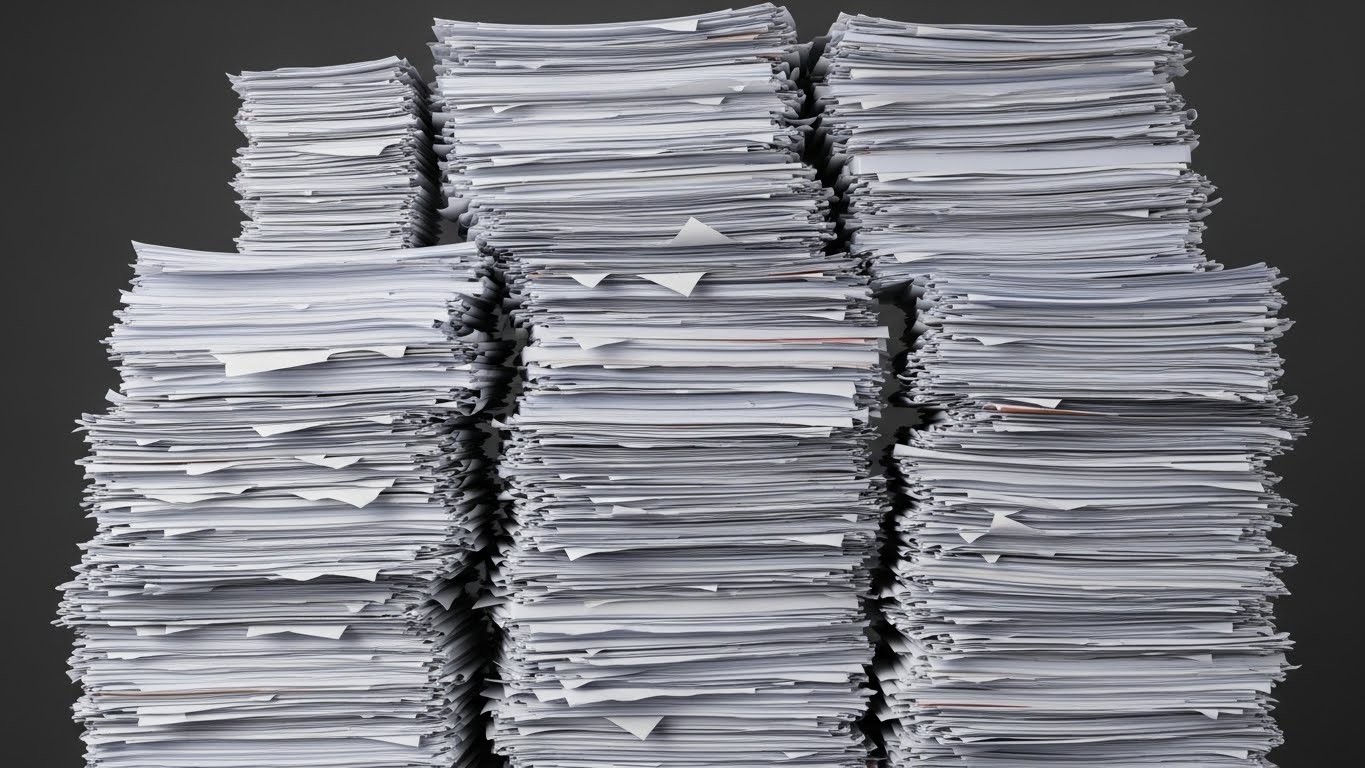
1. The Big Problem: Too Much Paper!
In America, when you want to insure your car or your house, you have to fill out forms. When you have an accident (like a tree falling on your roof), you send in pictures and bills. All of these are “documents.”
For a long time, insurance companies were buried under a “Paper Mountain.” Because people are slow at reading and typing, everything took a long time.
Think about it: If your car gets dented, you want it fixed now. You don’t want to wait three weeks because someone at the insurance company hasn’t read your email yet.That is why Insurance Digitisation is so important. It means turning that paper mountain into digital data that computers can understand instantly.
2. What is Intelligent Document Processing (IDP)?
You might ask, “Can’t computers already read?” Well, sort of.
The Old Way: OCR (The Eye)
There is an old technology called OCR for insurance (Optical Character Recognition). Think of OCR like a camera. It can take a picture of a page and say, “I see letters here.” But it doesn’t understand what it is reading. If it sees the number “1000,” it doesn’t know if that is dollars, a year, or the number of cats you own.
The New Way: IDP (The Brain)
Intelligent Document Processing (IDP) is different. It uses Artificial Intelligence (AI). It doesn’t just see the letters; it understands them.
Analogy: If OCR is like a parrot that repeats words without knowing what they mean, IDP is like a smart student who reads a story and can answer questions about it.When AI in document processing insurance looks at a messy form, it says:
“Aha! This number ‘1000’ is in the box that says ‘Total Cost’, so it must be money!”
This understanding makes insurance document processing super fast and smart.3. The Tech Team: The Eyes, The Brain, and The Hands
To make this magic happen, insurance companies use a team of three computer friends. We call this the “Tech Stack.”
1. The Eyes (OCR)
First, the computer needs to “see” the paper. It turns the scanned image into text. This is the first step.
2. The Brain (AI & Machine Learning)
This is the smart part. It looks at the text and figures out what is important.
It uses **Natural Language Processing (NLP)**. This is how computers understand human language. It knows that “John Smith” is a person’s name and “New York” is a place. It’s like teaching a computer to read English class!3. The Hands (Robotic Process Automation – RPA)
Once the Brain finds the important information (like “John Smith” and “$1000”), the Hands take over. Robotic Process Automation (RPA) in Insurance is a software robot that takes that info and types it into the company’s main computer system. It does the boring typing work so humans don’t have to.
Code Example: How OCR Reads a Document
Here’s a simple Python example showing how OCR extracts text from an image:
# Step 1: Import the OCR library
import pytesseract
from PIL import Image


# Step 2: Load the insurance form image
image = Image.open('insurance_claim.png')


# Step 3: Use OCR to extract text
text = pytesseract.image_to_string(image)


print("Extracted Text:")
print(text)
# Output: "Claimant Name: John Smith\nClaim Amount: $1000"
What’s happening? The OCR “sees” the image and turns it into text. But it doesn’t know what “John Smith” or “$1000” means yet!
3.5 How IDP Works: A Step-by-Step Journey
Let’s follow a real insurance form through the IDP process, like watching a package go through a factory!
Step 1: The Document Arrives
Mrs. Johnson’s car was hit by a tree. She takes a photo of the damage and fills out a claim form on her phone. She emails it to her insurance company. The form is messy—some parts are typed, some are handwritten, and the photo is a bit blurry.
Step 2: Pre-Processing (Cleaning Up)
Before reading, the AI cleans the image. It’s like when you erase smudges on your homework before turning it in.
The AI:- Straightens the crooked photo
- Makes the text sharper and clearer
- Removes shadows and stains
Step 3: Classification (Sorting)
The AI looks at the document and says, “This is a car insurance claim form, not a home insurance form.” It’s like sorting your school papers into different folders—math homework goes in the math folder!
Step 4: Extraction (Reading the Important Stuff)
Now the AI reads and finds:
• Name: Mrs. Johnson
• Policy Number: AUTO-12345
• Date of Accident: January 10, 2026
• Damage Amount: $2,500Step 5: Validation (Double-Checking)
The AI checks if everything makes sense:
✓ Is the policy number real? Yes!
✓ Is the date in the past (not the future)? Yes!
✓ Does the damage amount match the photo? Yes!Step 6: Human Review (Just in Case)
If the AI is 99% sure about everything, it processes the claim automatically. But if Mrs. Johnson’s handwriting is super messy and the AI is only 60% sure, it sends that part to a human to check. The human fixes it, and the AI learns for next time!
Step 7: Action Time!
The RPA “hands” take all this information and:
1. Update Mrs. Johnson’s file in the computer
2. Send her an email: “We got your claim!”
3. Schedule an inspector to look at her car
4. Start processing her paymentTotal time? About 2 minutes! Without IDP, this would take 2-3 days.
4. How Does This Help Us? (Use Cases)
So, why should we care? Because AI-driven solutions for insurance make life better for everyone in the USA.
Benefit 1: Fixing Things Faster (Claims)
Imagine a big hurricane hits Florida. Thousands of houses are damaged. Everyone calls their insurance company at the same time.
Without IDP: It takes months to read all the claims. People are stuck with holes in their roofs.
With IDP: The robots read the emails and forms instantly. They can help finish **Automated Claims Processing** in minutes! This means families get money to fix their homes much faster.Benefit 2: Buying Insurance is Easier (Underwriting)
When businesses buy insurance, they send huge files of information. It’s like sending a book report that is 500 words long.
IDP can read that “book report” in seconds and tell the insurance company, “This business is safe to insure.” This makes buying insurance quick and easy.Benefit 3: Following the Rules (Compliance)
In the USA, we have strict rules for insurance companies. There is a group called the **NAIC** (National Association of Insurance Commissioners) that acts like the Principal of a school. They make sure companies play fair.
Insurance document management systems help companies follow the rules. They keep a record of everything, so if the Principal checks, they can say, “Look, we did everything right!”4.5 Real-World Success Stories
Story 1: The Hurricane Helper
In 2024, Hurricane Zeta hit Louisiana. Over 50,000 homes were damaged. A big insurance company called “SafeHome Insurance” used IDP to process claims.
The Result: They processed 10,000 claims in the first week! Families got money to fix their roofs and windows super fast. Without IDP, it would have taken 3 months.Story 2: The Small Business Saver
A bakery owner named Mr. Lee wanted to insure his shop. He had to send 20 pages of documents—tax forms, building permits, and equipment lists. With old methods, it took 2 weeks to get approved.
With IDP: The AI read all 20 pages in 5 minutes. Mr. Lee got approved the same day and opened his bakery on time!Story 3: The Medical Mystery Solved
A worker named Sarah hurt her back at work. Her doctor wrote a 10-page medical report with lots of complicated words. The insurance company’s AI read the report and found the important parts:
• Injury type: Lower back strain
• Treatment needed: Physical therapy
• Time off work: 6 weeks
Sarah got her workers’ compensation approved in 24 hours instead of 3 weeks!5. Cool Apps in the USA (Insurtech)
There are new, cool companies in America called **Insurtechs**. They are like the “video game” version of insurance because they use so much tech.
- Lemonade: They have a chat-bot named “Jim.” You talk to Jim on your phone to file a claim. You don’t talk to a human! Jim uses AI to solve your problem in seconds.
- Root: They insure your car by looking at how you drive (using your phone’s sensors). They use data, not just paperwork, to give you a price.
- Hippo: They help protect homes using smart technology.
These companies are forcing the old, big companies (like State Farm or Geico) to use Digital Insurance USA tools too. Competition makes everyone better!
5.5 Challenges: It’s Not All Perfect
Even though IDP is amazing, it’s not perfect. Here are some challenges:
Challenge 1: Really Messy Handwriting
If a doctor writes like a chicken scratching in dirt, even the smartest AI might struggle! That’s why we still need humans to help sometimes.
Challenge 2: Privacy and Security
Insurance forms have personal information like your address, social security number, and medical history. Companies must keep this information super safe. They use encryption (like a secret code) to protect your data.
Challenge 3: Old Computer Systems
Some big insurance companies have computer systems that are 30 years old! It’s like trying to plug a new iPhone into a computer from 1995. The RPA “hands” help connect the new AI to these old systems, but it’s tricky.
Challenge 4: Teaching the AI
AI needs to learn from thousands of examples. If a company only has 10 examples of a rare form, the AI might not learn it well. It’s like trying to learn Spanish from only 10 words!
6. The Future: Even Smarter Robots!
Have you heard of ChatGPT? That is a type of “Generative AI.”
The future of Insurance automation solutions is using tools like that. Imagine a robot that can read a doctor’s messy handwritten note about a broken arm and perfectly understand it. That is happening right now!We are moving towards a world of “Hyper-automation.” That means the process is “Touchless.” You send a picture of your dented car, the AI looks at it, estimates the cost, and sends you money. No humans needed!
Code Example: How LLMs Understand and Extract Information
Here’s how a Large Language Model (LLM) like ChatGPT can read and interpret text:
# Step 1: Import the OpenAI library
import openai


# Step 2: The text extracted by OCR
ocr_text = "Claimant Name: John Smith. Claim Amount: $1000. Reason: Car accident on 01/10/2026."


# Step 3: Ask the LLM to extract structured data
response = openai.ChatCompletion.create(
    model="gpt-4",
    messages=[
        {"role": "system", "content": "You are an insurance document processor."},
        {"role": "user", "content": f"Extract the claimant name, amount, and reason from this text: {ocr_text}"}
    ]
)


# Step 4: Get the AI's answer
result = response['choices'][0]['message']['content']
print(result)
# Output: "Claimant: John Smith, Amount: $1000, Reason: Car accident"
What’s happening? The LLM doesn’t just see the words—it understands them! It knows “John Smith” is a person, “$1000” is money, and “Car accident” is the reason. This is the magic of AI in Insurance!
6.5 Comparing Old vs. New: The Big Difference
Task Old Way (Manual) New Way (IDP + AI) Reading a claim form 20 minutes per form 30 seconds per form Processing 1000 claims 2 weeks 1 day Accuracy (mistakes) 5-10% error rate 0.5% error rate Cost per document $3-5 $0.10-0.50 Works at night? No (people need sleep!) Yes (AI never sleeps!) The savings are huge! A medium-sized insurance company can save $5 million per year by using IDP!
7. Frequently Asked Questions (FAQs)
Q1: Will AI replace all insurance workers?
A: No! AI handles the boring, repetitive work (like typing data). This frees up humans to do the interesting stuff—like talking to customers, solving complex problems, and making important decisions. Think of it like calculators in math class. Calculators didn’t replace math teachers; they just made math faster!
Q2: Is my personal information safe with AI?
A: Yes! Insurance companies must follow strict laws like HIPAA (for medical info) and CCPA (in California). The AI systems use encryption and secure servers. It’s like keeping your diary in a locked safe that only you have the key to.
Q3: What if the AI makes a mistake?
A: There’s always a human checking the AI’s work, especially for big claims. If you get a claim denied and think it’s wrong, you can always ask a human to review it. The AI is a helper, not the final decision-maker.
Q4: Can I use IDP for my own documents?
A: Yes! There are apps like Adobe Scan and Microsoft Lens that use similar technology. You can scan your homework, receipts, or notes, and the app will turn them into text you can edit!
Q5: How long does it take to set up IDP?
A: For a big insurance company, it can take 6-12 months to fully set up. They need to train the AI on their specific forms and connect it to their computer systems. But once it’s running, it works 24/7!
Conclusion
So, the next time you see an insurance commercial, remember: it’s not just about boring paper anymore. It’s about smart robots, lasers (well, scanners), and super-fast computers working together.
By using Intelligent Document Processing (IDP) and Robotic Process Automation (RPA) in Insurance, companies are clearing that giant mountain of homework. They are turning paper into data, making things faster, cheaper, and better for all of us.
What Can You Do?
Even though you’re not running an insurance company (yet!), you can start learning about AI and automation:
- Learn to Code: Try learning Python (like the examples above) on websites like Code.org or Scratch.
- Explore AI Tools: Play with ChatGPT or Google Bard to see how AI understands language.
- Stay Curious: The future belongs to people who understand both technology AND people. Maybe you’ll be the one who invents the next big thing in insurance tech!
The world of Digital Insurance USA is growing fast. By 2030, experts predict that 80% of all insurance documents will be processed by AI. That’s a lot of homework being done by robots!
Remember: Technology is a tool to help humans, not replace them. The goal is to make insurance faster, fairer, and easier for everyone. And that’s something we can all be excited about!
-

How Intelligent Bots Streamline Workflows
Businesses often struggle with repetitive tasks that consume valuable time and human resources. Intelligent bots are transforming operations by automating processes, reducing manual effort, and ensuring consistent performance.
These bots, powered by technologies like Python, FastAPI, and NLP libraries, can handle tasks such as reading emails, processing forms, updating CRMs, and even interacting with APIs. For example, a customer support bot can analyze incoming messages, categorize them, and assign them to the appropriate team member—instantly.
One of the most impactful uses is in data entry automation. A well-configured bot can pull data from multiple sources (websites, emails, PDFs), process and clean it, and input it into a database. Event-based orchestration allows bots to trigger actions only when specific events occur, reducing resource consumption.
To build such bots, developers typically use workflows combining cron jobs, webhooks, and services like Zapier or AWS Lambda. FastAPI serves as a reliable backend framework to build REST APIs that bots can consume. Adding natural language processing lets bots interpret user queries more effectively.
In short, bots are the workforce of the digital age—working 24/7, error-free, and at scale. Integrating them into your business improves speed, reduces errors, and allows teams to focus on strategic tasks.